


Think of an Amazon label as your product's non-negotiable passport. Without the right one, your inventory gets stuck at the border of Amazon's massive fulfillment network. This leads to costly delays, unplanned fees, and—worst of all—lost sales.
Getting your Amazon label requirements right isn't just a technicality; it's fundamental to your success on the platform.
Why Your Amazon Labels Are More Than Just Stickers
For any seller using Fulfillment by Amazon (FBA), a product label isn't just for show. It’s the key that unlocks Amazon's entire logistics machine, ensuring your products are received correctly, stored efficiently, and shipped to customers without a single hiccup. Getting this wrong can bring your entire operation to a grinding halt.
The whole system is built on a few core barcode types, and each one has a very specific job.
Your Guide to Amazon’s Barcode Lingo
It’s easy to get lost in the alphabet soup of acronyms. Let's break down the big three you absolutely need to know:
- UPC (Universal Product Code): This is your product's universal birth certificate. It’s the standard barcode recognized by retailers everywhere, not just on Amazon. Think of it as the barcode you'd see on a product at Target or Walmart.
- ASIN (Amazon Standard Identification Number): This is your product's public address on the Amazon website. It's the unique identifier for the listing page that customers see and is generated by Amazon when you create a new product in their catalog.
- FNSKU (Fulfillment Network Stock Keeping Unit): This is your product’s unique employee ID badge, exclusive to Amazon's warehouses. It directly links a specific unit to your seller account, preventing your inventory from getting mixed with identical products from other sellers.
Understanding these differences is the first step toward compliance and brand protection. For instance, the choice between using a manufacturer's UPC or an Amazon-generated FNSKU is a major one. It determines whether your inventory is kept separate (commingled) or mixed with identical products from other sellers, a decision with huge implications.
To make this even clearer, here's a quick reference table to help you keep these straight.
Quick Guide to Amazon Barcode Types
| Barcode Type | What It Represents | Primary Use Case |
|---|---|---|
| UPC | A universal product identifier | Retail identification, creating new Amazon listings |
| ASIN | An Amazon-specific listing identifier | The product's catalog page on Amazon.com |
| FNSKU | A seller-specific inventory identifier | Tracking individual units within Amazon's FBA network |
This table helps simplify the core function of each barcode, showing how they work together to get your product from the manufacturer to the customer's doorstep.
The Foundation of FBA Success
When a fulfillment center associate scans your label, it instantly tells their system what the product is, who it belongs to, and where it needs to go. Any ambiguity—like a smudged barcode or the wrong label type—creates a bottleneck that requires manual intervention, costing you time and money.

This process is critical because a staggering 82% of active Amazon sellers rely on FBA, making mastery of these label requirements non-negotiable. To even participate in FBA, every single product usually needs a unique FNSKU label. This is what allows Amazon's warehouses to track your inventory with precision amid millions of daily scans. You can find more insights on FBA seller statistics on redstagfulfillment.com.
Ultimately, you have to stop viewing labeling as a chore and start seeing it as a competitive advantage. A flawless labeling process prevents costly errors, protects your brand from mix-ups, and ensures your products are always ready for speedy delivery to your customers.
Mastering the FNSKU Barcode for FBA
While a UPC is a product’s universal ID, the FNSKU (Fulfillment Network Stock Keeping Unit) is its exclusive backstage pass for Amazon's fulfillment network. This Amazon-specific barcode is the single most important tool you have for inventory control, directly tying every physical unit back to your seller account. It’s how the warehouse teams know that an item belongs to you and not another seller listing an identical product.
Think of it this way: a dozen different sellers might offer the exact same black t-shirt. Every shirt has the same UPC, making them indistinguishable on the shelf. The FNSKU, however, acts like a custom name tag you put on your shirts. It guarantees that when a customer buys from your store, they get your inventory—not a potentially lower-quality or even counterfeit version from someone else.
The Critical Choice: FNSKU vs. UPC
When you add a new product to your FBA inventory, Amazon will give you a choice: use the manufacturer barcode (like a UPC) or an Amazon barcode (the FNSKU). It sounds simple, but this decision has huge implications for your brand.
Choosing the manufacturer's barcode opts you into something called commingled inventory. This means your products are physically stored alongside identical items from every other seller. While it might feel a little easier upfront, it’s a massive risk. If another seller sends in damaged or fake goods, they get tossed into the same bin as your pristine inventory. When an order comes through, Amazon just grabs the closest unit, which could easily be one of the faulty ones. This can lead to a storm of negative reviews, returns, and even account suspensions—all for a problem you had nothing to do with.
Using an FNSKU barcode sidesteps this mess entirely. It ensures your inventory is kept separate and is the only stock used to fulfill your orders. This is the bedrock of brand protection within the FBA ecosystem.
How to Generate FNSKU Labels in Seller Central
Thankfully, creating FNSKU labels is a straightforward process you can handle right from your Seller Central account as you build out a shipment.
Here's the quick-and-dirty breakdown:
- Head to Manage FBA Inventory: From your main dashboard, hover over "Inventory" and click "Manage FBA Inventory."
- Pick Your Product: Find the product that needs labels and check the box next to it.
- Select 'Print Item Labels': In the action dropdown menu just above your inventory list, choose "Print Item Labels."
- Confirm and Generate: On the next page, you'll tell Amazon how many labels you need and what kind of label paper you're using (e.g., 30-up label sheets). Click "Print Labels," and Amazon will generate a PDF file for you.
This PDF contains your unique FNSKU barcodes, ready to be printed and applied to your products. Make sure they are printed clearly and follow all of Amazon's specs—a blurry or poorly placed label won’t scan, and that’s a fast track to receiving delays at the warehouse.
Pro Tip: Never, ever use a screenshot or a resized image of your barcode. Always print directly from the PDF that Seller Central generates. This preserves the exact scaling and resolution needed for a perfect scan. Any distortion can make the label unreadable and cause major headaches down the line.
Why the FNSKU Is Non-Negotiable for Brand Control
At the end of the day, the FNSKU is more than a logistical tag; it's a shield for your quality control and brand integrity. By keeping your stock isolated, you guarantee every customer who buys from you gets the exact product you sourced, prepped, and shipped.
For private label brands and resellers who pride themselves on quality, skipping the FNSKU is a gamble you can't afford to take. It protects your reputation, walls you off from the risks posed by other sellers, and ensures the customer experience is always consistent. This simple label is one of the most powerful safeguards you have in the Amazon marketplace, making it an absolutely essential part of your FBA strategy.
How to Print and Apply Labels for Perfect Scans
Generating a compliant FNSKU label is only half the battle. The real test comes when it arrives at an Amazon fulfillment center. If that label can't be scanned quickly and accurately, your inventory can get delayed, rejected, or hit with unplanned service fees for relabeling.
Many sellers stumble on the physical process of printing and applying labels, but getting it right is what guarantees a smooth check-in. Think of the barcode scanner at the warehouse as a very picky gatekeeper. It needs a clear, high-contrast, and properly placed "ticket" to grant your products entry. Anything less can create a major bottleneck.
This visual guide shows the simple flow from creating your FNSKU in Seller Central to getting it on your product and out the door.
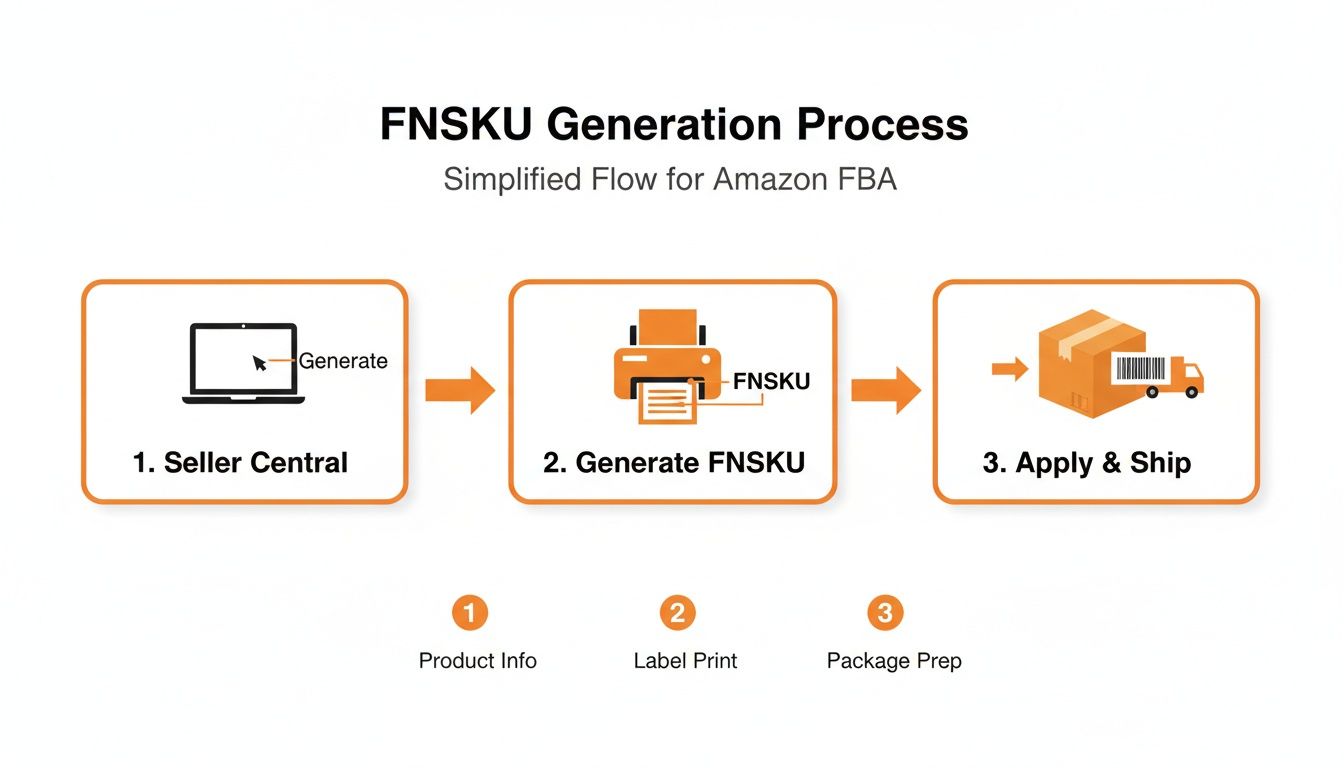
This process really highlights how critical the physical printing and application steps are. They're the final checkpoint before your products leave your control.
Choosing the Right Tools for the Job
Your choice of printer and label stock directly impacts scannability. It might be tempting to use a standard office inkjet printer, but that’s a recipe for smudged, unreadable barcodes that will fail at the warehouse.
- Thermal Printers: These are the gold standard for FBA labeling. They use heat to create the image, which means no ink or toner to smudge or fade. They're fast, reliable, and produce crisp, durable labels that can withstand the rigors of shipping.
- Laser Printers: A solid second choice. Laser printers use toner that fuses to the label paper, making them far more resistant to smudging than inkjet prints. Just be sure to use high-quality label sheets designed for laser printers.
Regardless of the printer, your labels must be printed on non-reflective white stock with removable adhesive. Amazon also requires a minimum print resolution of 300 DPI (dots per inch) to ensure the barcode lines are sharp enough for their scanners to read.
A common mistake is printing labels from a screenshot or a resized image. Always print directly from the original PDF generated by Seller Central. This ensures the barcode maintains its precise dimensions and resolution—something that's absolutely essential for a successful scan.
Applying Your Labels with Precision
Where you place the label is just as important as how you print it. The goal is to make the FNSKU the single, obvious barcode for warehouse staff to scan. Applying it incorrectly can confuse the system and lead to serious receiving errors.
Follow these placement rules to stay out of trouble:
- Cover All Other Barcodes: Your FNSKU must be the only visible barcode on the product's outer packaging. Use it to completely cover the original manufacturer barcode (like a UPC or EAN). Don't just try to strike through the old one with a marker; it has to be fully obscured.
- Place on a Flat, Smooth Surface: The label should be applied completely flat, without wrapping around corners, curves, or seams. Any wrinkles, bubbles, or folds can distort the barcode and cause scan failures.
- Avoid Edges and Openings: Keep the label away from the edges of the box and any openings. This prevents it from getting damaged during transit or when the package is opened by the customer.
- Ensure Accessibility: Make the label easy for a person (and a scanner) to find. Don't hide it on the bottom of a box or under a packaging flap.
For products in special packaging, the rules are slightly different but follow the same logic.
Placement on Different Packaging Types
- Poly Bags: Apply the label to the outside of the bag on a flat, clearly visible surface. If the bag is transparent, make sure the FNSKU is the only scannable barcode visible through the plastic.
- Bubble Wrap: If an item is wrapped in bubble wrap for protection, the label must be applied to the exterior of the wrap. Never place it on the product underneath, as it won't be scannable.
- Case-Packed Boxes: Each individual sellable unit inside the box must have its own FNSKU label. The outer master carton gets its own separate shipping label, not an FNSKU.
- "Sold as Set" Items: For bundled products, a "Sold as Set" or "This is a Set, Do Not Separate" sticker should be applied to the packaging. The single FNSKU label should be placed on the outside of the bundle's wrapping.
By treating label application as a crucial quality control step, you prevent your inventory from being stopped at the fulfillment center's front door. A perfect scan is the first step to a fast and efficient FBA receiving process.
Navigating Special Labeling for Restricted Categories
Once you've nailed down the FNSKU, you've handled the most common Amazon label. But that's just the start. If you're selling anything from supplements and beauty products to groceries and bundled items, there's another layer of labeling you can't ignore. Amazon has specific rules for these products to keep customers safe, make sure inventory is handled correctly, and avoid confusion in the warehouse.
Getting these special labels wrong is a surefire way to get your inventory rejected or, even worse, your account suspended. These aren't just suggestions—they're strict requirements that manage everything from a product's shelf life to how it's stored. Think of them as extra stamps in your product's passport, each one clearing it for a different checkpoint in the FBA system.

Let's walk through the most common special labels you’ll run into.
Expiration Date Labels for Perishable Goods
Any product that can expire needs an expiration date. This includes supplements, cosmetics, and most grocery items. It’s a non-negotiable rule that ensures customers get fresh products and helps Amazon’s warehouses rotate stock properly. The FNSKU barcode simply doesn't tell them this critical piece of information.
Amazon is extremely particular about the formatting here:
- Required Format: The date must be in MM-DD-YYYY format. A product expiring on September 15, 2026, has to be labeled 09-15-2026.
- Font Size: The font must be 36-point or larger so it's impossible for warehouse staff to miss.
- Placement: The label must go on each individual unit or its retail packaging. If you’re shipping case packs, the date also needs to be clearly visible on the outside of the master carton.
The MM-DD-YYYY format is an absolute must. Using formats like "SEP 15 26" or "15/09/2026" will get your inventory flagged and rejected at check-in, causing massive delays.
Suffocation Warnings for Poly Bags
Safety is everything at Amazon, and that extends to your packaging. Any poly bag with an opening of 5 inches or more (when laid flat) is required to have a suffocation warning. This is a crucial safety measure to protect children.
The warning has to be printed or stickered in a prominent spot on the bag, using a font size that’s easy to read relative to the bag’s size. The exact wording can differ, but the message must be clear. A common example is: “Warning: To avoid danger of suffocation, keep this plastic bag away from babies and children. Do not use this bag in cribs, beds, carriages, or playpens. This bag is not a toy.”
Labels for Bundles and Multi-Packs
When you sell multiple items as a single product, you need to make it obvious to warehouse staff that they shouldn't be separated. Amazon's system is built to scan individual items, so you have to give a clear signal that your bundle is one complete unit.
To do this, you must apply a label to the outside of the package that says:
- "Sold as Set"
- "This is a Set, Do Not Separate"
- "Ready to Ship"
Place this sticker right next to the FNSKU barcode. It’s a direct instruction to fulfillment center employees, ensuring your bundle makes it from the receiving dock to the customer's front door intact. Without it, you’re risking your sets being broken apart and sold as individual items, which means incorrect orders and very unhappy customers.
Hazmat Labels for Dangerous Goods
Products classified as hazardous materials (hazmat)—like anything with lithium batteries, aerosols, or certain chemicals—are under the tightest labeling scrutiny. These goods need special handling and storage to meet federal regulations and keep warehouse workers safe.
Here's what managing hazmat labeling typically involves:
- Provide a Safety Data Sheet (SDS): Before shipping anything, you have to upload a compliant SDS for the product in Seller Central. Amazon’s Dangerous Goods team reviews this to classify your product.
- Apply Required Labels: Depending on that classification, your product might need specific UN numbers, class diamonds (like the flammable liquid symbol), or other regulatory markings on its outer packaging.
- Use FBA Dangerous Goods Program: You must be enrolled in the FBA Dangerous Goods (Hazmat) program. This gives you access to specialized fulfillment centers designed to handle these items safely.
Getting a handle on these special Amazon label requirements is a must for any brand selling in these categories. Each label plays a vital role, from safety and compliance to operational efficiency, and knowing them inside and out is key to scaling on the platform.
Avoiding Common Mistakes and Costly Penalties
Every labeling mistake, no matter how small, has a price tag. Ignoring Amazon's strict rules isn't just a minor oversight—it's a fast track to unplanned fees, stalled shipments, and lost revenue. Think of a perfect label as your product's express pass into the FBA network. A flawed one is a guaranteed detour.
Understanding the link between common slip-ups and their real-world consequences is how you build a foolproof QC process. Tiny errors, like a slightly smudged barcode or a misplaced FNSKU, can trigger a domino effect of operational and financial headaches that are completely avoidable.
The Real Cost of a Bad Label
When a shipment with non-compliant labels hits an Amazon fulfillment center, it gets kicked into a manual process called "problem-solving." This immediately sidelines your inventory. Instead of getting checked in and made available for sale, your products are set aside for a human to fix—and that always costs you money.
The most immediate hit is the Unplanned Prep Service Fee. If Amazon has to relabel your products because the barcodes are unscannable, incorrect, or missing, they’ll charge you for every single item. It might seem small on a per-unit basis, but it can absolutely wreck the profitability of an entire shipment.
A pallet of 1,000 units with bad labels could easily rack up a $0.40 per-item fee. That’s a surprise $400 bill you weren't expecting, not to mention the sales you lose while your inventory is in limbo.
Beyond the direct fees, the delays can be even more damaging. Your products sit unsellable for days or even weeks, which can lead to stockouts, a drop in your Best Seller Rank (BSR), and a dead stop to your sales velocity.
Common Errors That Trigger Penalties
Mistakes usually fall into a few predictable buckets. Once you know what Amazon’s scanners and warehouse teams are looking for, you can get ahead of these issues before your shipment even leaves your warehouse.
Here are the most frequent labeling errors we see that lead to penalties:
- Poor Print Quality: A barcode that’s smudged, faded, or printed below 300 DPI is a guaranteed scan failure. This is a classic issue with inkjet printers and is the number one reason Amazon charges relabeling fees.
- Incorrect Placement: Slapping the FNSKU label over a corner, on a seam, or anywhere it isn't flat will distort the barcode. Another big one is failing to completely cover the original manufacturer's UPC, which confuses scanners and forces a manual sort.
- Wrong Barcode Type: Using a UPC for your non-commingled inventory or an internal SKU instead of the required FNSKU will grind the receiving process to a halt. The system won't recognize the product, and your entire shipment could get rejected.
- Missing Regulatory Labels: Forgetting a required suffocation warning on a poly bag or an expiration date on a supplement leads to more than just fees. It can get your inventory flagged for disposal for safety reasons, resulting in a total loss.
To make it crystal clear, this table connects these common mistakes to their direct financial and operational outcomes.
Connecting Labeling Errors to Amazon Penalties
| Common Mistake | Potential Amazon Penalty | How to Prevent It |
|---|---|---|
| Unscannable FNSKU | Unplanned service fees for relabeling; shipment delays. | Use a thermal printer at 300 DPI and always print from the original PDF file. |
| Old UPC is Visible | Receiving errors; fees for covering the old barcode. | Make sure the FNSKU label completely covers any other scannable codes. No exceptions. |
| Missing Expiration Date | Shipment rejection or disposal of inventory at your expense. | Follow the MM-DD-YYYY format and use a 36-point font or larger so it’s easily readable. |
| Label Wraps a Corner | Scan failure and manual processing fees. | Always apply labels to a flat, smooth surface well away from any edges or seams. |
Ultimately, dialing in your labeling process is one of the highest-leverage things you can do for your Amazon business. It directly protects your profits, keeps your inventory available for sale, and ensures your account stays in good standing. A proactive approach to these Amazon label requirements will save you far more time and money than fixing problems after they’ve already happened.
Got Questions? We’ve Got Answers.
Even with the best processes in place, tricky situations always pop up. Think of this section as your on-the-spot troubleshooting guide for the most common labeling curveballs we see sellers face. We'll get straight to the point with clear answers for those "what if" moments.
Let's dive into the practical questions that can trip up even seasoned marketplace managers. These are the quick-fire solutions you'll need to solve problems fast and keep your FBA operations running smoothly.
Can I Just Print the FNSKU Directly on My Product Box?
Yes, you can—and honestly, for most established brands, it's the smartest move you can make. Printing the FNSKU barcode right onto your packaging during manufacturing completely cuts out the manual, peel-and-stick labeling step. This means less time, lower labor costs, and zero chance of someone slapping a label on crookedly.
But if you go this route, you have to get it right. No exceptions.
- Print Quality is King: The barcode needs to be printed at a crisp 300 DPI resolution. Anything less and you risk it being unscannable.
- Give It Breathing Room: You absolutely must leave a "quiet zone" of at least 0.25 inches of white space around all sides of the barcode. Scanners need this buffer to read the code properly.
- One Code to Rule Them All: If the FNSKU is printed on the box, it has to be the only scannable barcode. Cover up or remove any other codes, like the UPC, to avoid confusion at the warehouse.
Once your product has found its footing, integrating the FNSKU into your packaging design is a game-changer. It streamlines everything from the factory floor right up to the fulfillment center.
What if My Product Doesn't Have a UPC or Manufacturer Barcode?
This is a super common scenario, especially if you're in the private label game, sell handmade goods, or create your own custom bundles. If your product doesn't already have a standard barcode like a UPC or EAN, you cannot use Amazon's commingled inventory. It's not an option. You must use an Amazon barcode (FNSKU).
The process is pretty simple. When you create the new product listing in Seller Central, Amazon assigns it a unique ASIN. From there, you just head over to your inventory management page and generate the FNSKU labels for that ASIN. This FNSKU becomes the one and only identifier for your product inside Amazon's network.
For any product that doesn't have a universal retail barcode, the FNSKU isn't a suggestion—it's a requirement. This is Amazon's system for tracking unique items that aren't in the global catalog, ensuring your products never get lost in the shuffle.
When Does It Make Sense to Hire a Prep Center for Labeling?
Outsourcing your labeling to a third-party logistics (3PL) provider or an FBA prep center is a strategic decision that can pay for itself in time and sanity. It's an investment in efficiency that lets you focus on growing your business instead of getting buried in tedious tasks.
You should seriously consider outsourcing if any of these sound familiar:
- You're Drowning in Volume: If you're moving hundreds or thousands of units, the time you spend on manual labeling becomes a massive operational bottleneck. A prep center has the team and tools to knock this out in a fraction of the time.
- Your Prep is Complicated: Does your product need more than just a label? Think poly bagging, bubble wrapping, or building multi-packs. Prep centers are experts in navigating all of Amazon's detailed prep rules.
- You've Run Out of Space (or Hands): Many sellers outgrow their garage or office. A prep center gives you the physical warehouse and staff you need without the massive overhead of leasing your own space and hiring employees.
- You Source Internationally: This is a big one. You can ship goods directly from your overseas manufacturer to a US-based prep center. They’ll handle inspection, labeling, and forwarding everything to Amazon, saving you a fortune in time and shipping costs.
Yes, there's a per-item fee, but the real value is in buying back your time to focus on sourcing, marketing, and the big-picture strategy.
What Happens to Returned Items with Damaged Labels?
When a customer sends an FBA item back, Amazon gives it a once-over. If the product is still sellable and the FNSKU label is perfectly fine, they'll pop it right back into your inventory. But if the packaging is torn or the label is damaged, that item gets flagged as "Unfulfillable."
You have a few ways to handle this dead inventory:
- Create a Removal Order: Have Amazon ship the item back to your own warehouse. From there, you can inspect it, slap on a fresh FNSKU label (and new packaging if needed), and send it back in with your next FBA shipment.
- Let Amazon Dispose of It: If it’s a low-cost product, sometimes the math doesn't work out. It might be cheaper to pay Amazon a small fee to dispose of the item rather than pay for removal, relabeling, and shipping.
- Use the FBA Grade and Resell Program: For certain eligible products, you can let Amazon do the work. They will evaluate the returned item, give it a grade (like "Used – Like New"), and relist it for you. It's a great way to recover some cash from returns without ever touching the product yourself.
Staying on top of your unfulfillable inventory is crucial. It helps you cut your losses, protect your profits, and keep your overall inventory health score in good shape.
Managing every detail of your Amazon label requirements is essential for growth, but it can be a major drain on your resources. At Clickstera Solutions LLC, we handle the complexities of full-service account management—from optimizing listings and managing inventory to executing advanced PPC campaigns. Let our team of Amazon Verified Partners build a cohesive strategy that drives visibility, sales, and sustainable profit growth. Learn more about scaling your brand with Clickstera.