
Loading article
Loading page...

Here’s your practical guide to setting up Google Analytics 4, built specifically for marketplace and e-commerce brands. Getting GA4 up and running really comes down to three core phases: first, creating your property and data stream; second, getting your tracking tags implemented with Google Tag Manager or gtag.js; and finally, configuring the key e-commerce events that actually tell you what’s happening on your site. We’ll walk through each stage together.
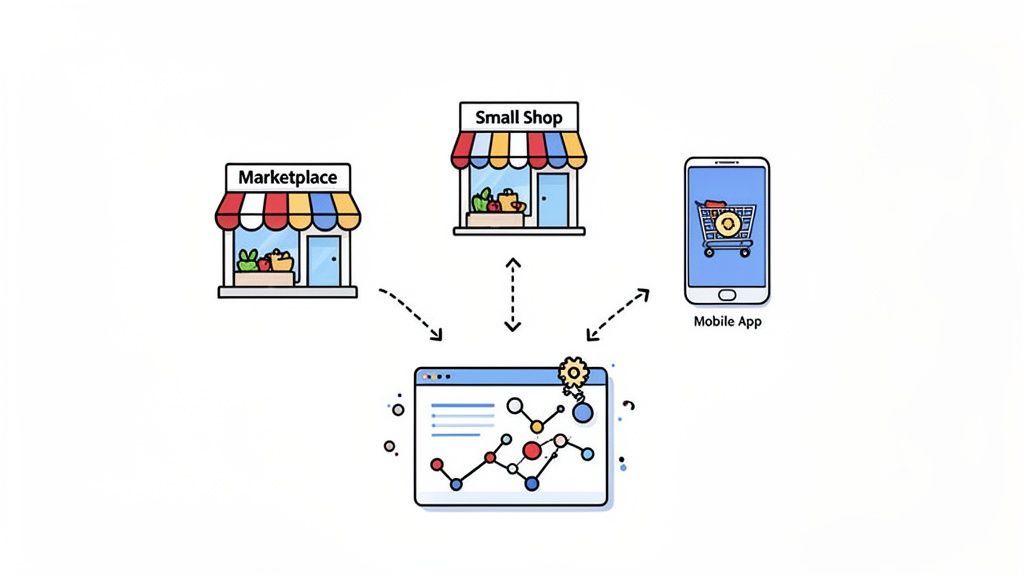
Moving to Google Analytics 4 is way more than a simple software update—it’s a fundamental shift in how you measure what your customers are doing. The old Universal Analytics was built around sessions and pageviews, a model that just can’t keep up with the messy, fragmented journey of a modern online shopper.
GA4, on the other hand, is built on an event-based model.
This means every single user interaction—from a page view to an add_to_cart click or a video play—gets recorded as its own distinct event. This approach is a perfect match for e-commerce and marketplace sellers who need to follow the complex paths buyers take across different platforms and devices.
The switch to GA4 isn’t just a friendly suggestion; it’s the new standard for web analytics. By January 2024, nearly one-third of all Google Analytics properties worldwide had already made the move. The adoption rate is even higher among high-traffic brands, with 43.35% of the world’s top 10,000 websites now running on GA4.
This industry-wide shift highlights just how valuable the platform is. For an e-commerce brand, knowing how to set up Google Analytics 4 properly gives you a serious competitive edge. It lets you:
For marketplace sellers, this event-driven framework is a game-changer. It moves beyond just tracking the final sale to illuminating the crucial micro-conversions that lead to a purchase, giving you a much clearer picture of what actually drives your revenue.
At the end of the day, a well-configured GA4 property is a cornerstone of your digital toolkit. It turns raw data into a clear story about your customers, leading to smarter marketing spend, better user experiences, and more effective e-commerce growth strategies. This guide is your roadmap to building that solid analytics foundation.
Alright, let’s get your GA4 property and data stream set up. This is the first real step in your migration, and getting it right now will save you a ton of headaches later.
Think of a GA4 property as the main hub for your website’s data. Everything you track will live inside this container, so a clean setup is non-negotiable.
First, head over to the Admin section in Google Analytics—it’s the little gear icon in the bottom-left corner. If you’re totally new to GA, no worries. Just go to the main site, and it’ll walk you through creating an account and your first property.
When you hit “Create Property,” you’ll be asked for a few details. Don’t just fly through this part; these settings are more important than they look.
After this, Google will ask for some business details. For now, you can just select “Get baseline reports” to keep things moving. We’ll get to the more advanced configurations later.
It’s easy to put this off, but delaying your GA4 setup has real consequences. When Universal Analytics stopped processing new data on July 1, 2023, brands that hadn’t migrated risked losing their historical analytics for good. For a business doing $10M–$50M a year, that’s like trying to forecast sales with a blindfold on. You can read more about the mandatory analytics update to understand just how high the stakes were.
With the property created, it’s time to tell Google Analytics where to pull data from. You’ll do this by setting up a Data Stream, which is basically the pipeline connecting your website to your new GA4 property.
Since you’re running an e-commerce store, you’ll choose the “Web” option.
Pop in your website URL, give the stream a name, and you’ll immediately see one of the best features of GA4: Enhanced Measurement.
This screen is your command center for this data stream. It gives you that all-important “G-” Measurement ID and lets you control the automated tracking features.
This is where GA4 really starts to shine. Enhanced Measurement automatically tracks a bunch of important user actions right out of the box—no extra code required. This was a huge pain point in Universal Analytics that is now solved.
By default, it’s already set up to track:
video_start, video_progress, and video_complete for embedded YouTube videos automatically.For almost any e-commerce site, leaving all of these on is the right move. Once you click “Create stream,” you’ll land on the Web stream details page. This is where you’ll find your Measurement ID (it’ll start with “G-“).
This ID is the key to everything. Copy it, save it, and keep it handy. You’ll need it for the next step, where we connect your website to GA4 and start seeing that data flow in.
Alright, you’ve got your GA4 property live. Now, it’s time to actually hook it up to your website and let the data start flowing. While you could just slap the GA4 tracking code directly onto your site, I’m going to tell you right now: using Google Tag Manager (GTM) is the way to go for any serious e-commerce brand.
Think of GTM as a central command center for all your tracking scripts. It’s not just for Google Analytics—it’s where you’ll manage your Google Ads tags, social media pixels, and everything in between. It gives you incredible control and flexibility without having to constantly bother your developers to edit website code. Honestly, it’s the professional standard for a reason.
The very first tag you need to create is the GA4 Configuration tag. This is the foundational piece—the main bridge between your website and your new GA4 property. Its only job is to load the GA4 script on every single page of your site, setting the stage for all the detailed tracking that will follow.
Here’s how to get it done:
That single ID tells GTM exactly where to send all the data it collects.
Next, you have to tell the tag when to fire. For this main configuration tag, the answer is simple: you want it on every page, without exception. Under the Triggering section, select the Initialization – All Pages trigger. This one is specifically designed to fire before almost everything else, making sure your analytics setup is the first thing to load.
Give your tag a clear name, like “Google Tag – GA4 Config,” and hit save. You’re now connected.
This flowchart gives you a simple visual of how the data flows, from creating the property right down to finding that critical Measurement ID you just used.
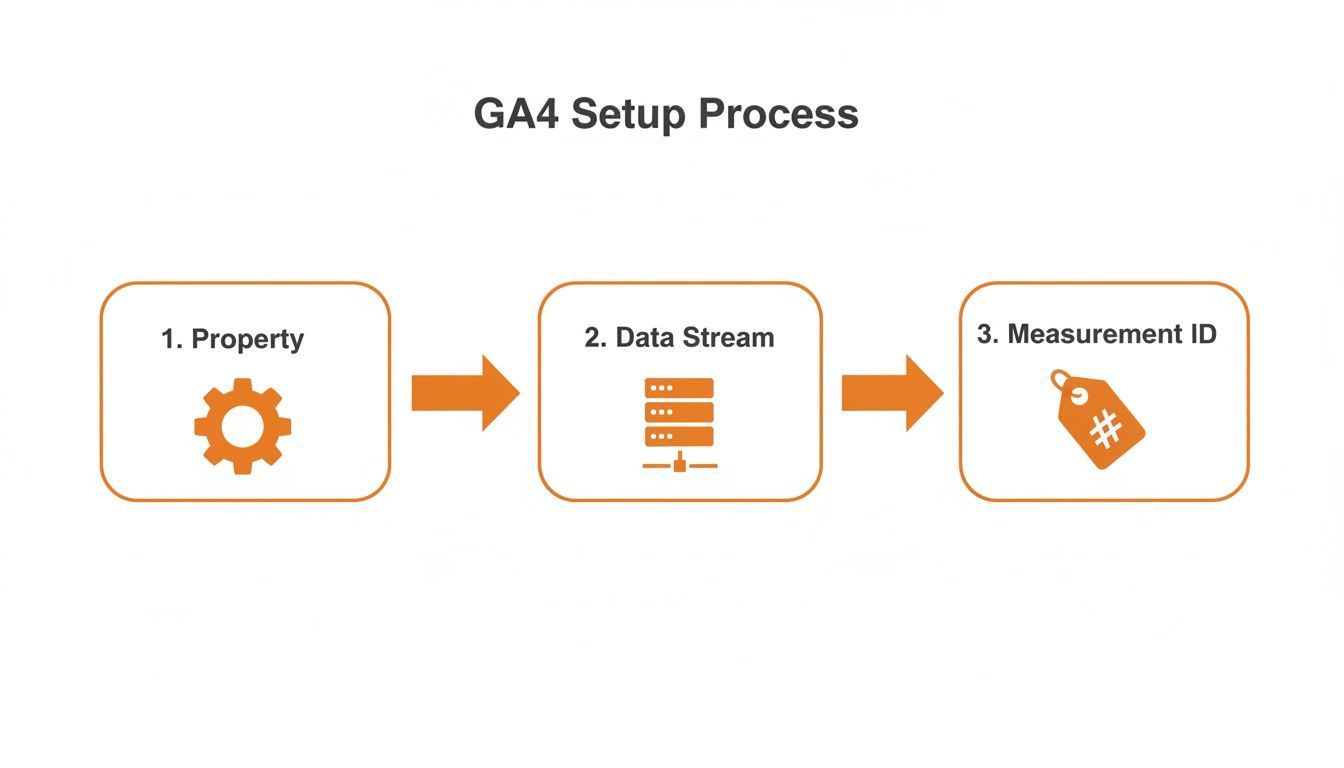
As you can see, getting that Measurement ID from your data stream is the key that unlocks the connection between GA4 and powerful tools like GTM.
With the main connection in place, you can start tracking what users are actually doing. In GTM, this is handled with a GA4 Event tag. This is the workhorse tag you’ll use for everything from tracking a product view to a newsletter signup.
The move to an event-based model is the biggest shift in GA4, and this step is where you really put it into practice. This new structure is a perfect match for the customer journey on performance marketplaces, where small actions like adding a product to the cart are just as important as the final sale.
Plus, GA4 is built to seamlessly handle both web and app data in one property. That’s a huge deal when mobile drives over 60% of e-commerce traffic and apps often see much higher conversion rates. With Google Analytics used on over 80% of the world’s top websites, getting this event-based setup right is non-negotiable. You can discover more insights about the state of Google Analytics to understand just how dominant it is.
Let’s walk through a real-world example: tracking an add_to_cart button click.
add_to_cart. Stick to Google’s recommended event names whenever you can—it keeps your data clean and organized.Now for the cool part. The Event Parameters section is where you can send extra, dynamic information along with the event. For an add_to_cart event, you’d want to include details like the product’s name, its price, and its ID. This is done by setting up Variables in GTM to pull that data directly from your site’s data layer (a more advanced topic we’ll get into later).
Pro Tip: Never, ever hard-code values like product names or prices directly into your event tags. Always use GTM Variables to pull this information dynamically. This makes your tracking scalable and means you don’t have to create a new tag for every single product on your site.
Finally, you need a Trigger to tell GTM when to fire this event tag. You could set up a trigger that fires whenever a user clicks a button with the text “Add to Cart.” Once it’s all set up, GTM will listen for that specific click, package up your add_to_cart event with all its product details, and send it straight to GA4.
By creating a simple template like this, you can start tracking every key interaction across your entire site.

Alright, with your basic GA4 property up and running, it’s time to get into the good stuff—measuring what actually drives revenue. GA4’s entire model is built around events, which makes it a perfect match for e-commerce. It uses a specific set of recommended events to map out the entire customer shopping journey, from that first curious click to the final sale.
Getting these events set up correctly is the most critical part of a proper e-commerce GA4 implementation. It’s what transforms your analytics from a simple page-view counter into a powerhouse for business insights.
You could invent your own event names, but I strongly advise against it. The best practice is to stick with Google’s recommended e-commerce events. Why? Because this ensures all your data flows correctly into GA4’s built-in e-commerce reports and plays nice with other tools like Google Ads.
For any e-commerce site, there are a few non-negotiable events you absolutely need:
view_item: This fires when a user looks at a specific product detail page. It tells you which products are grabbing the most eyeballs.add_to_cart: This one triggers the moment an item is added to the shopping cart. It’s one of the strongest signals of purchase intent you can get.begin_checkout: Fired when a user clicks that “checkout” button and starts the payment process. Tracking this is key to figuring out where people drop off before buying.purchase: The big one. This event logs a successfully completed transaction and is the ultimate goal.But just tracking the event name isn’t enough. The real magic is in the event parameters—small bits of data you send along with each event to give it context. You don’t just want to know that a product was added to a cart; you need to know which product it was, its price, and how many were added.
For marketplace sellers, this is where the gold is. Rich parameter data helps you understand which vendors or product categories are driving the most engagement. This lets you build incredibly specific audiences for retargeting campaigns based on what people actually did on your site.
The key to unlocking powerful reporting is sending a standardized set of parameters with each event. The most important one is the items array, which holds all the juicy details about the product(s) involved.
Here’s a quick look at the events you should implement and the essential parameters to include with each one. Getting this right is what powers GA4’s detailed monetization reports.
Event Name
When It Fires
Key Parameters
Importance for Marketplaces
view_item
A user views a product detail page.
currency, value, items (with item_id, item_name)
Pinpoints top-performing vendor products and categories.
add_to_cart
A user adds a product to their shopping cart.
currency, value, items (with item_id, item_name, price, quantity)
Identifies high-intent users and products with strong conversion potential.
begin_checkout
A user initiates the checkout process.
currency, value, items, coupon (if applicable)
Measures commitment to purchase and helps diagnose cart abandonment.
purchase
A transaction is successfully completed.
currency, value, items, transaction_id, shipping, tax
Directly tracks revenue, sales volume, and overall business performance.
For example, when a shopper adds a $99.00 sweater to their cart, your add_to_cart event should include the currency (“USD”), the value (99.00), and an items array detailing the item_name, item_id, and price. It’s this level of detail that makes GA4 so valuable.
This is the final, crucial step. Just because you’re tracking an event doesn’t mean GA4 knows it’s a big deal for your business. You have to explicitly tell it which events count as a successful outcome by marking them as Conversions.
For any online store, the purchase event is the ultimate conversion. Everything else leads up to this moment.
Setting this up is surprisingly simple. Head over to Admin > Conversions. GA4 often lists events it suspects are important. All you need to do is find purchase in the list and flip the toggle switch to mark it as a conversion. It takes two seconds, but the impact is massive.
Marking purchase as a conversion accomplishes two critical things:
Beyond the obvious purchase event, you can mark other actions as conversions, too. For example, if you have a “notify me when back in stock” feature, you could mark the sign_up event as a secondary conversion. This flexibility helps you measure every single action that contributes to your bottom line and is a huge part of improving e-commerce conversion rates across your entire site.
You’ve done the heavy lifting of configuring your e-commerce events and conversions. Now it’s time for the final, critical phase: connecting GA4 to your wider marketing ecosystem and making sure everything works flawlessly. This is where your data stops being a passive report and becomes an active tool that sharpens your advertising and deepens your analysis.
The single most important connection for any e-commerce brand is linking GA4 to your Google Ads account. This isn’t just a nice-to-have; it’s the key to running smart, data-driven advertising campaigns. Hooking the two platforms together creates a powerful synergy, letting you share audiences, import conversions, and see ad performance right inside your analytics reports.
Why is this so crucial? Because it allows your GA4 conversion data to flow directly into Google Ads. This enables smarter bidding strategies that optimize for what really matters—actual purchases, not just clicks. It also lets you build incredibly specific retargeting audiences in GA4 (think “users who added an item to their cart but didn’t buy”) and push them directly to Google Ads.
This two-way data street is a game-changer. For marketplace sellers, understanding which ad campaigns drive valuable on-site actions helps you connect the dots between your ad spend and your sales. If you’re running ads across different platforms, you’ll find our guide on Amazon Attribution as the missing link between Google Ads and Amazon sales particularly useful for building a cohesive measurement strategy.
For brands ready to dig even deeper, GA4 also offers a native integration with BigQuery, Google’s data warehouse. This connection exports raw, unsampled event data, opening the door for complex analysis far beyond what the standard GA4 interface can offer.
With your accounts linked, it’s time to confirm that every single tag, trigger, and parameter is firing exactly as you planned. Never assume your setup is working correctly—always verify. The best tool for this job is GA4’s built-in DebugView.
Think of it this way: Google Tag Manager’s Preview mode confirms that your website is sending the right signals. GA4’s DebugView confirms that Google Analytics is hearing and understanding those signals correctly. You need both for end-to-end verification.
To get started, enable the Google Analytics Debugger Chrome extension, or just keep your GTM Preview mode active. Next, navigate to Admin > DebugView in your GA4 property. As you click around your site and perform key actions, you’ll see a real-time stream of events pop up.
Here’s a look at what a live DebugView session looks like, with events like session_start and page_view appearing in a chronological timeline.
Every event in the stream is clickable, revealing all the parameters that were sent along with it. This granular view is exactly what you need for troubleshooting.
This immediate feedback loop is invaluable. For instance, if you click an “add to cart” button and don’t see the add_to_cart event show up in DebugView, you know there’s a problem with your GTM trigger. If the event appears but is missing the item_name parameter, your variable isn’t configured correctly. It’s that simple.
Catching these issues in DebugView before you publish your container prevents bad data from polluting your reports. It’s the final quality check that ensures you can trust your analytics from day one. This step is what separates a sloppy, amateur setup from a professional-grade analytics implementation—one that gives you a solid foundation for every business decision you make.
Even with the best guide in hand, setting up GA4 can feel like navigating a new city without a map. It’s a huge leap from Universal Analytics, and it’s perfectly normal to hit a few confusing spots. Let’s walk through some of the most common hurdles that e-commerce and marketplace sellers run into.
Getting your head around these nuances is what separates a basic setup from a powerful one. It’s not just about following steps—it’s about understanding the why behind them so you can trust your data.
This question comes up a lot, especially from folks who were managing analytics before the big switch. While “dual-tagging”—running both UA and GA4 at the same time—was the go-to strategy during the transition, it’s no longer relevant for new data.
Universal Analytics officially stopped processing new hits on July 1, 2023. For any reporting from that point forward, GA4 is your one and only source of truth. If you’re just getting your analytics in order now, your focus should be 100% on building a solid, accurate GA4 implementation from the ground up.
For any brand where the customer journey jumps between different websites, cross-domain tracking is absolutely critical. A classic e-commerce example is when a user clicks from your main marketing site (like yourbrand.com) to a separate Shopify-hosted storefront (your-store.myshopify.com) to complete their purchase.
Without the right setup, GA4 would see that journey as two separate visitors, which completely shatters your conversion path analysis and makes it impossible to attribute sales correctly.
Luckily, GA4 makes this much easier to handle than its predecessor.
Once this is configured, GA4 automatically passes a unique client ID between the domains. This keeps the user’s session intact, giving you a complete, unbroken view of their path to purchase.
Getting cross-domain tracking right is non-negotiable for understanding the true performance of your marketing channels. It ensures a click from a Google Ad is properly credited with a sale, even if that sale happens on a different domain.
The old “Bounce Rate” we all knew is essentially gone, and honestly, it’s for the best. It was an often-misleading metric that just measured single-page sessions without any real context. GA4 replaces it with much smarter engagement metrics that actually tell you if users are interacting with your site.
The new star of the show is the Engaged session. A session counts as “engaged” if the user does one of the following:
purchase).From this, GA4 calculates your Engagement rate—the percentage of sessions that were engaged. While you might still see a “Bounce rate” metric in some reports, it’s now just the inverse of your engagement rate. This new model gives you a much clearer picture of whether your content is actually holding people’s attention.
This is a moment of pure frustration: you’ve set up your tags in GTM, you’re testing on your site, but absolutely nothing is showing up in GA4’s DebugView. Before you start pulling your hair out, run through this quick checklist. It usually solves the problem.
First, the obvious one: did you actually enable debug mode? The quickest way is to use the official Google Analytics Debugger Chrome extension. Alternatively, just keeping Google Tag Manager’s Preview mode active on your site will do the trick.
Next, jump over to GTM’s Preview mode and see if your tags are even firing on your website. Did the Google Tag – GA4 Config fire when the page loaded? Did the event tag’s trigger activate when you performed the action you’re tracking? If GTM isn’t sending the event in the first place, GA4 has nothing to receive. Sometimes there’s a small delay, so a quick refresh and trying the action again is always worth a shot.
Navigating your marketplace growth requires a partner who understands the full picture, from ad spend to analytics.
At Clickstera Solutions LLC, we specialize in building cohesive strategies that connect your marketing efforts to measurable results, leveraging tools like GA4 to drive sustainable profit.
Learn how we can help you scale faster.
Talk to Clickstera and get a clear next-step plan to scale your performance marketing.